Robot Karaoke
By Gabriella Vasquez and Jada Nazarian
|
Content
Circuit: a complete loop of conductive materials from one side of a power source (+) to the other (-). Voltage: the potential energy difference across a component in a circuit. Eq: V=ir Current: the flow of charge through a circuit. Resistance: the amount the current is slowed or resisted through a component of a circuit. Series: A circuit where currents must run through all components, one after another. Parallel: two or more pathways that current can "choose" to run through. Power: the rate at which electrical energy is transefered. Breadboard: units for making temporary circuits and prototyping Arduino: open-source electronics platform or board and the software used to program it. Reflection
This was not one of my favorite projects, and I had a lot of difficulty going through the unit. Even though the circuits were hard, I believe I did well with my persistence and determination to finish the project. I can across many roadblocks and difficulties during this project, but I always found a way to overcome them. Another thing I believed I have improved on during this project is my leadership abilities. I took charge of this project and helped my teammate as much as I could. But since this was a difficult project for me, there are some things I can improve. One thing I should work on is self advocating. When I got stuck on a problem, I tended to try to figure it out by myself, when I should have asked someone for help. Another thing I could improve on is micro management. When I do take charge, I usually take over everything without allowing the other people to do what they wanted to do. All in all though, this was a good project to do for the experience. |
The Robot Art Show was an assignment to teach us programming and circuits. The final project was our own creation of a circuit that could do anything we wanted. We were asked to imagine what the futures art would look like if it were created by robots. Before we were allowed to create our own circuits, we had to go through 16 Arduino programs. These required each group to create what the programming needed on the breadboard and to run the simulation. This helped give us background information before we started designing our own.
The short clip at left is the only video I have of our finished project. We programmed ours to play the notes to the chorus of "Don't Stop Believing" and have the LCD screen displaying the words so that one could sing along. The picture below is our circuit diagram. This shows what each part is and where it goes in correlation to the breadboard. 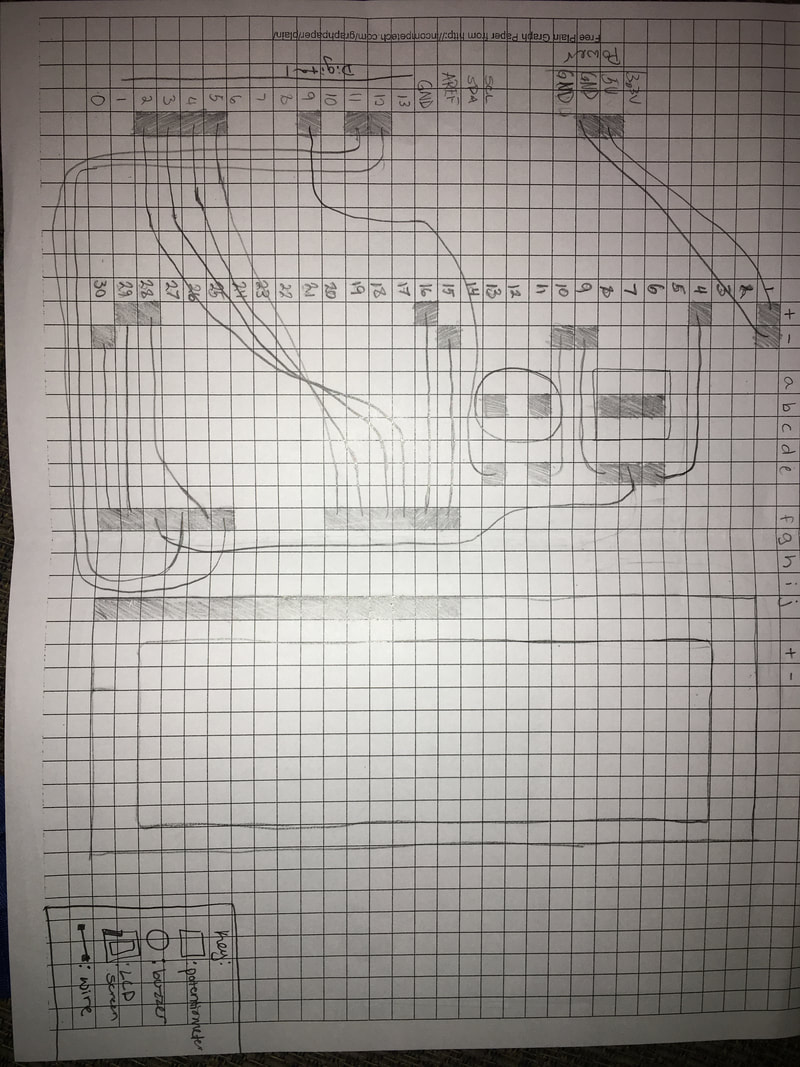
The below button is a link to my partners page:
|
